Section 3: The Mapping System
3.1 The 7-Point Protocol
The VELONÉ 7-Point Protocol is the foundational mapping system for all brow work. It establishes the structural landmarks that govern brow placement, proportion, and symmetry. No stroke work begins until all seven points are identified and documented.
The protocol is not optional. It is the diagnostic foundation upon which all subsequent decisions rest. A brow mapped incorrectly cannot be executed correctly—errors in mapping propagate through every phase of the work.
Protocol Principles
- Anatomical priority: Points are determined by facial structure, not existing hair growth
- Bilateral assessment: Both brows are mapped before any execution begins
- Documentation requirement: All points are recorded photographically and in writing
- Client confirmation: The mapped design is reviewed with the client before execution
The 7-Point Protocol
Purpose: Establish the foundational mapping points
The seven essential points that form the foundation of brow mapping: medial origin, inferior and superior head boundaries, apex position and height, and tail terminus position and height.
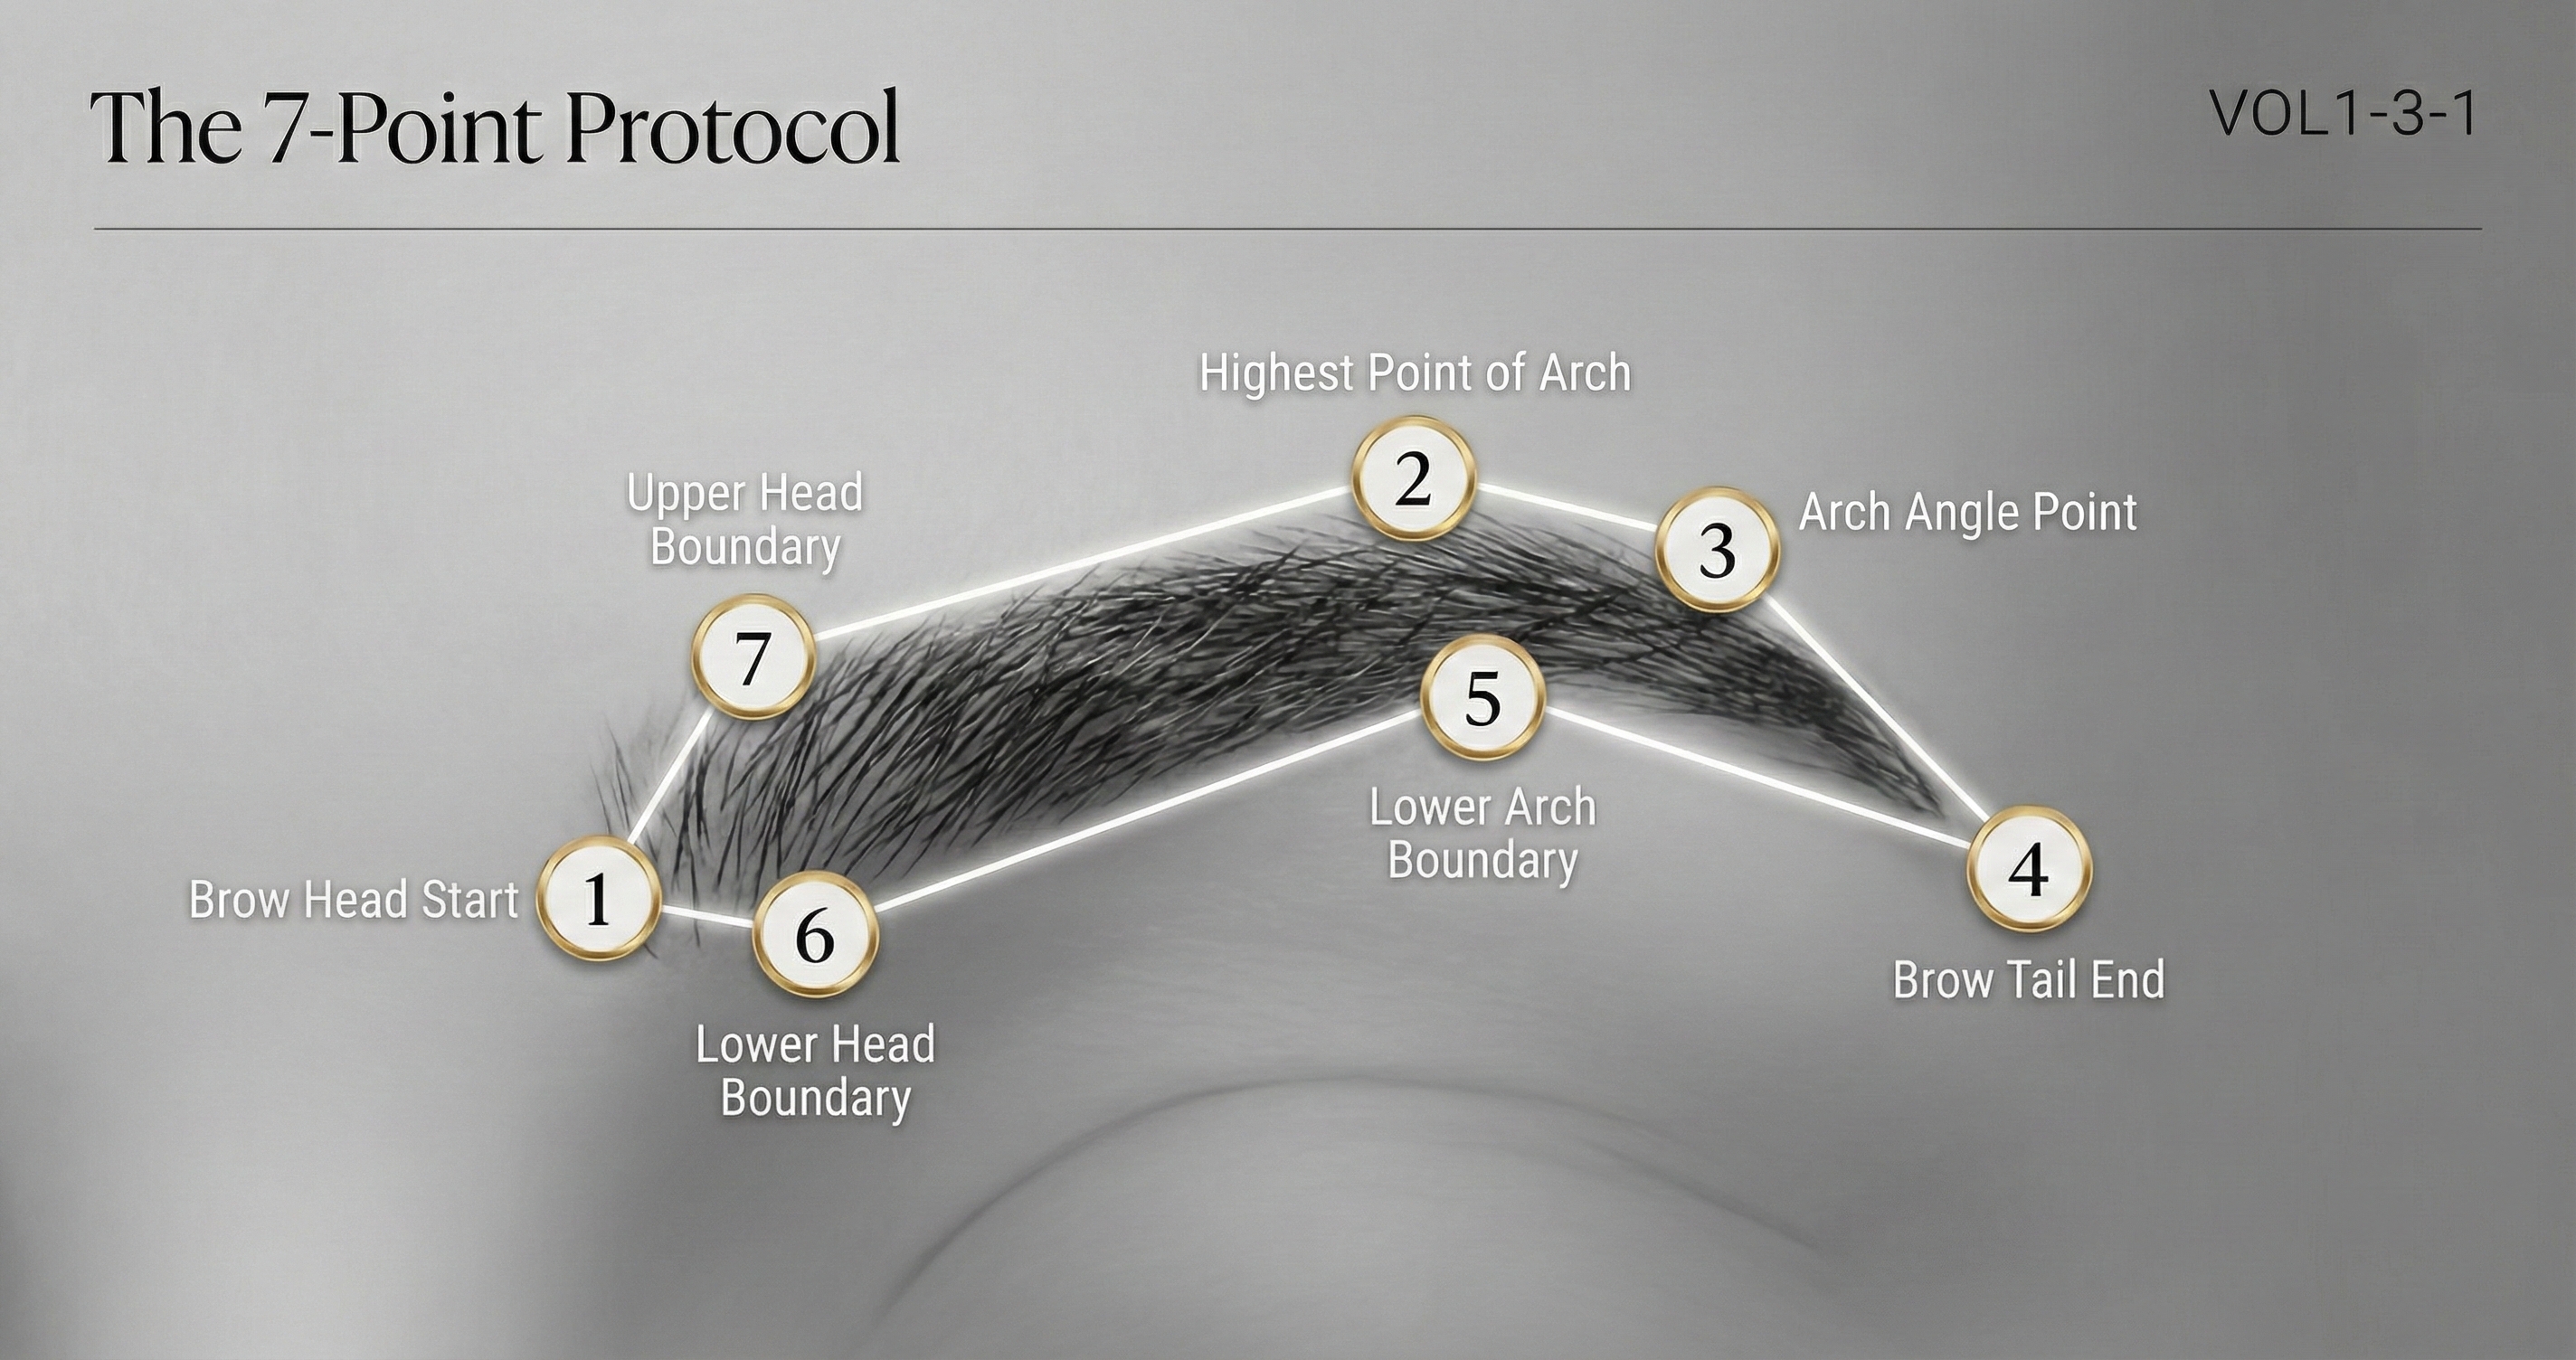
3.2 The Seven Landmark Points
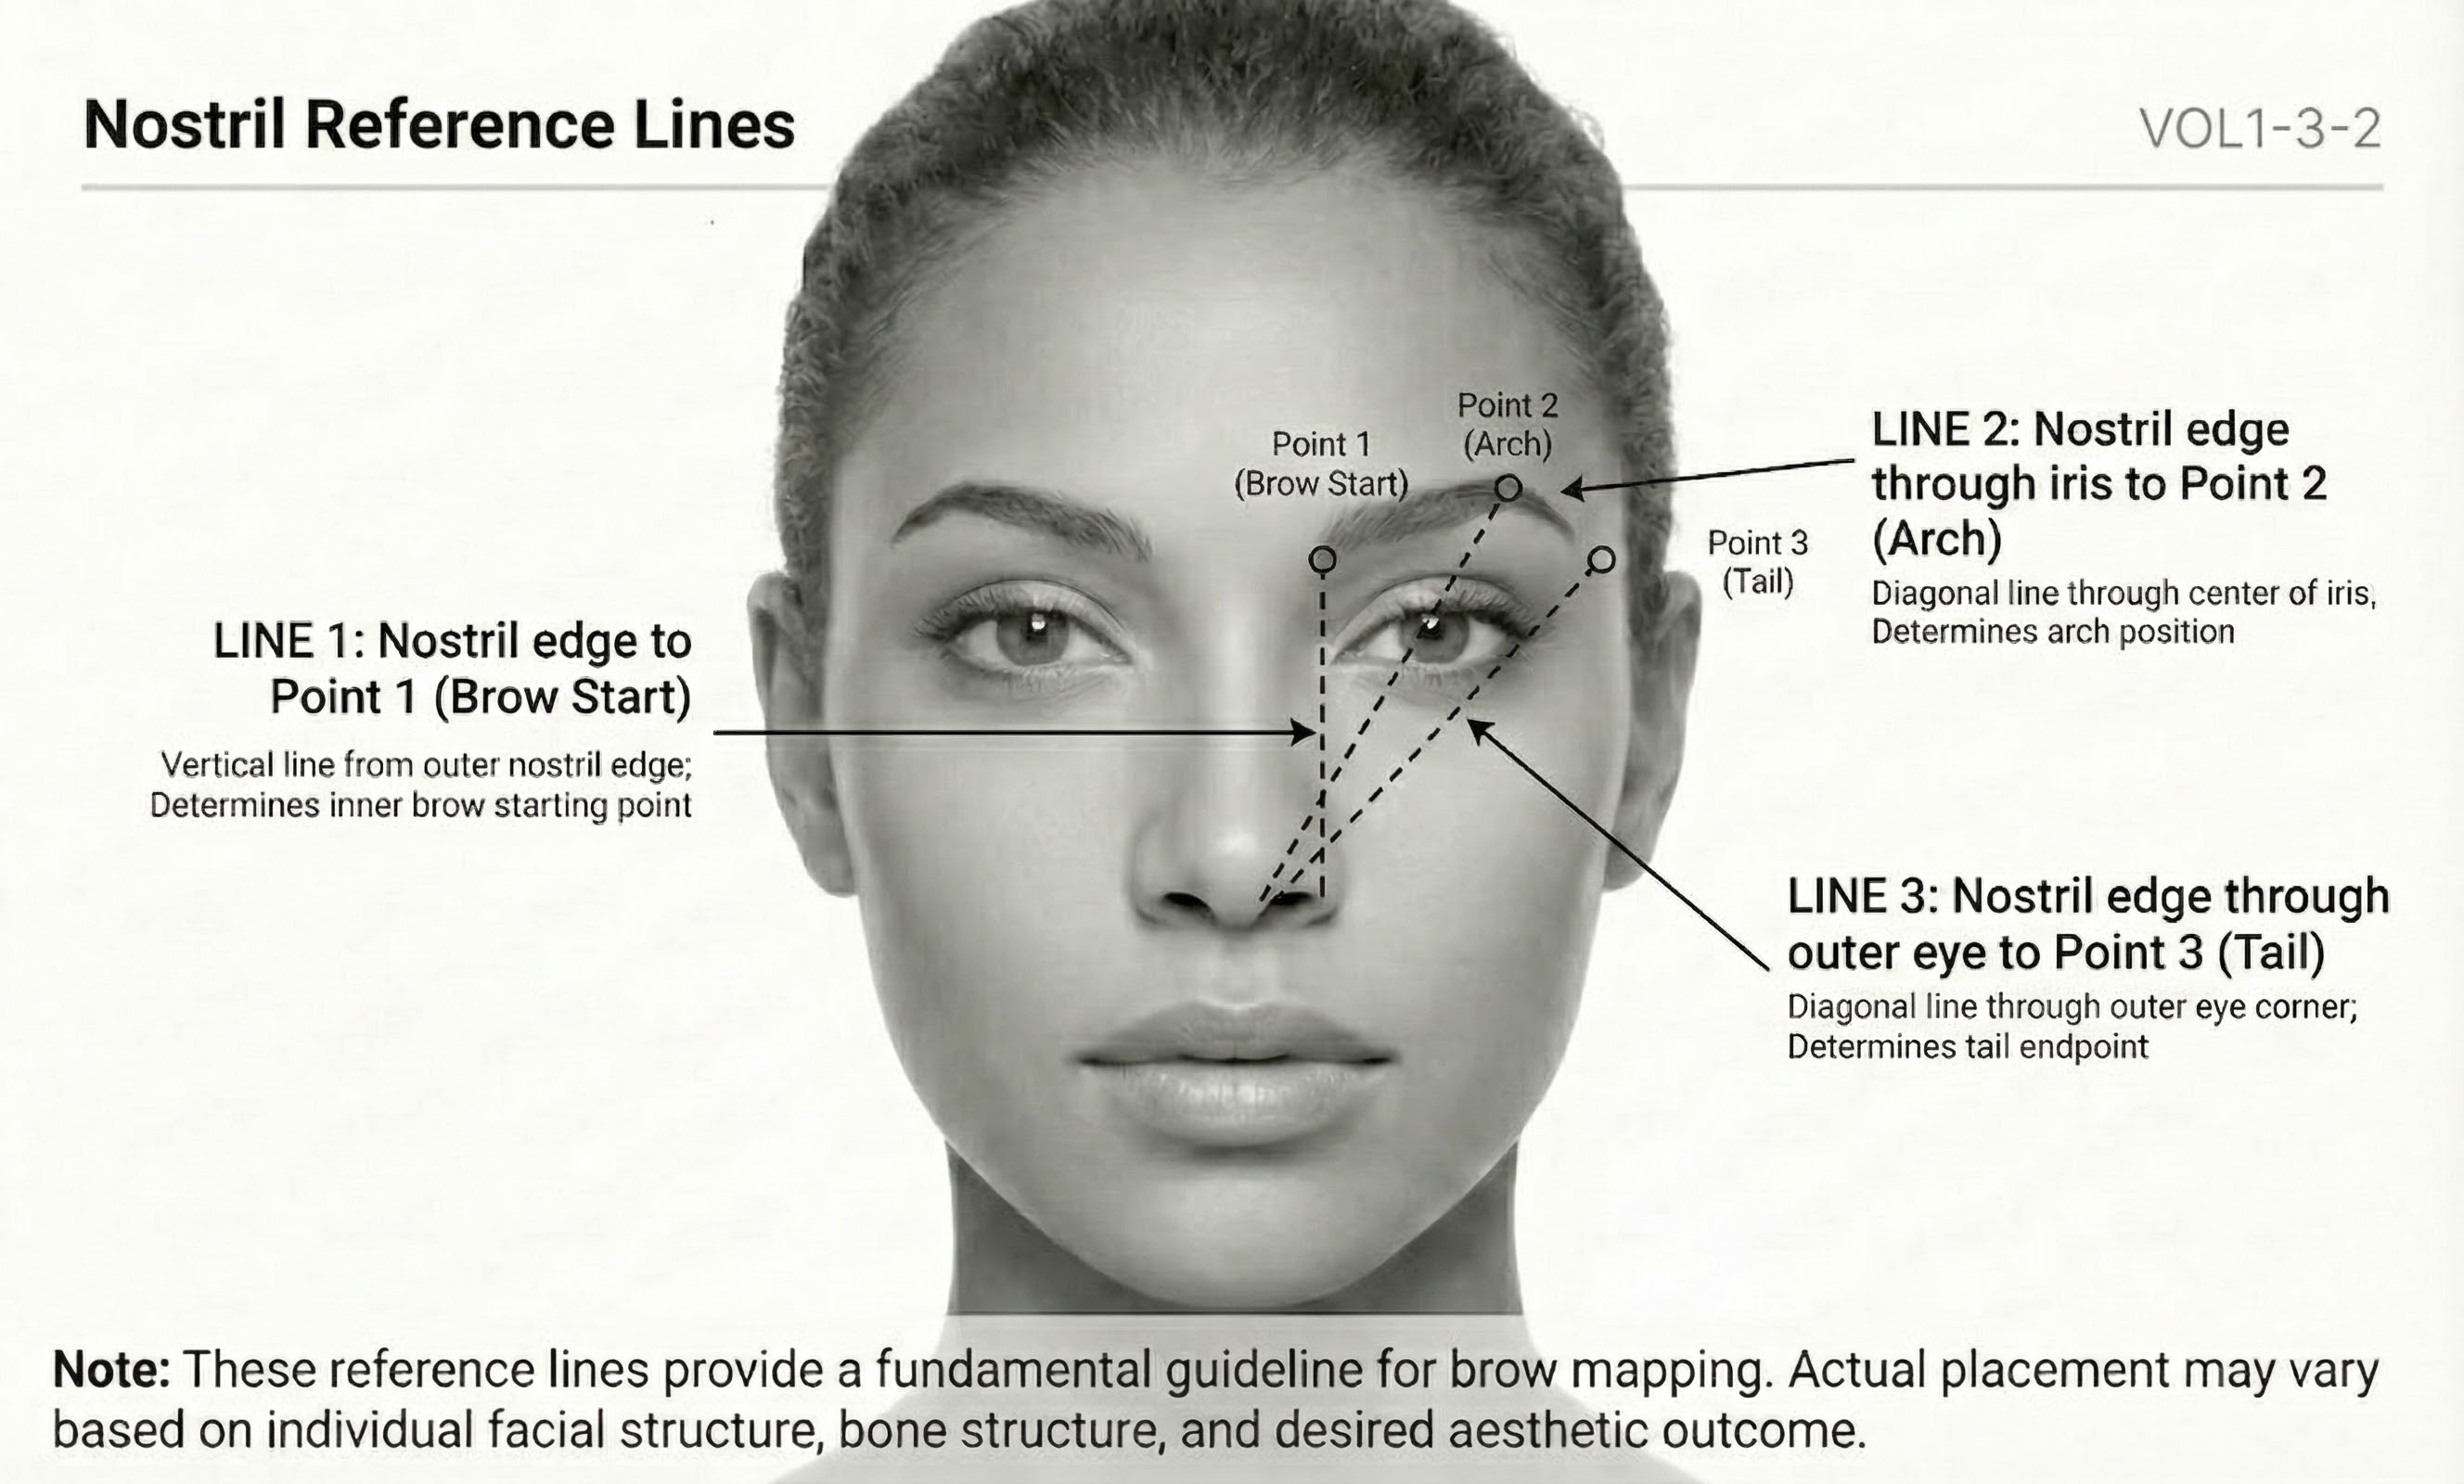
Facial Reference Lines
Purpose: Show key facial reference lines for positioning
Key facial reference lines extending from nostril landmarks to brow positions for accurate mapping and alignment.
Point 1: Medial Origin (Head Start)
The medial origin establishes where the brow begins. It is determined by a vertical line rising from the inner nostril edge. This point defines the innermost boundary of the brow head.
Common error: Placing the origin too close to the glabella, creating an over-connected appearance.
Point 2: Inferior Head Boundary
The lower boundary of the head zone, establishing the baseline from which all vertical measurements are referenced. This point should align with the natural brow bone contour.
Point 3: Superior Head Boundary
The upper boundary of the head zone, defining the maximum vertical height of the brow. The distance between Points 2 and 3 establishes the head height—the widest vertical dimension of the brow.
Point 4: Apex Position
The apex marks the highest point of the brow arch. Its horizontal position is determined by a line extending from the nostril outer edge through the iris (or lateral limbus, depending on eye position). Standard placement ranges from 60-70% of total brow length.
Style family variation: Classic and Soft Harmony favour medial apex (60-65%); Elevated and Modern Edge favour lateral apex (68-72%).
Point 5: Apex Height
The vertical position of the apex relative to the head height. This measurement determines the degree of arch—from subtle curves to pronounced peaks.
Point 6: Tail Terminus Position
The endpoint of the brow tail, determined by a line extending from the alar crease through the lateral canthus. This establishes the maximum horizontal extent of the brow.
Common error: Over-extending the tail beyond this landmark, creating a drooping or dated appearance.
Point 7: Tail Terminus Height
The vertical position of the tail endpoint. The baseline rule dictates that this point should fall at or slightly above the inferior head boundary (Point 2). A tail terminating significantly below this line creates a drooping effect.
Symmetry Assessment Protocol
Purpose: Systematic symmetry evaluation
A systematic approach to assessing and documenting brow symmetry with measurement checkpoints and documentation template.

3.3 Mapping Execution
Mapping is performed in a specific sequence to ensure accuracy and consistency. The following protocol should be followed for every client.
Pre-Mapping Preparation
- Client positioned upright with neutral facial expression
- Hair secured away from the face
- Skin cleansed and free of makeup
- Adequate lighting positioned to eliminate shadows
Mapping Sequence
- Establish centre line: Identify the facial midline using the nose bridge and philtrum
- Map Point 1 (both sides): Vertical projection from inner nostril edge
- Map Points 2 and 3 (both sides): Inferior and superior head boundaries
- Map Point 4 (both sides): Apex horizontal position
- Map Point 5 (both sides): Apex vertical height
- Map Points 6 and 7 (both sides): Tail terminus position and height
- Connect landmarks: Draw the brow outline connecting all points
- Assess symmetry: Compare bilateral measurements and adjust as needed
Tools Required
- Brow mapping pencil or string
- Measuring callipers (for precise measurements)
- Mapping ruler or flexible curve
- White pencil for marking (visible on all skin tones)
- Documentation camera
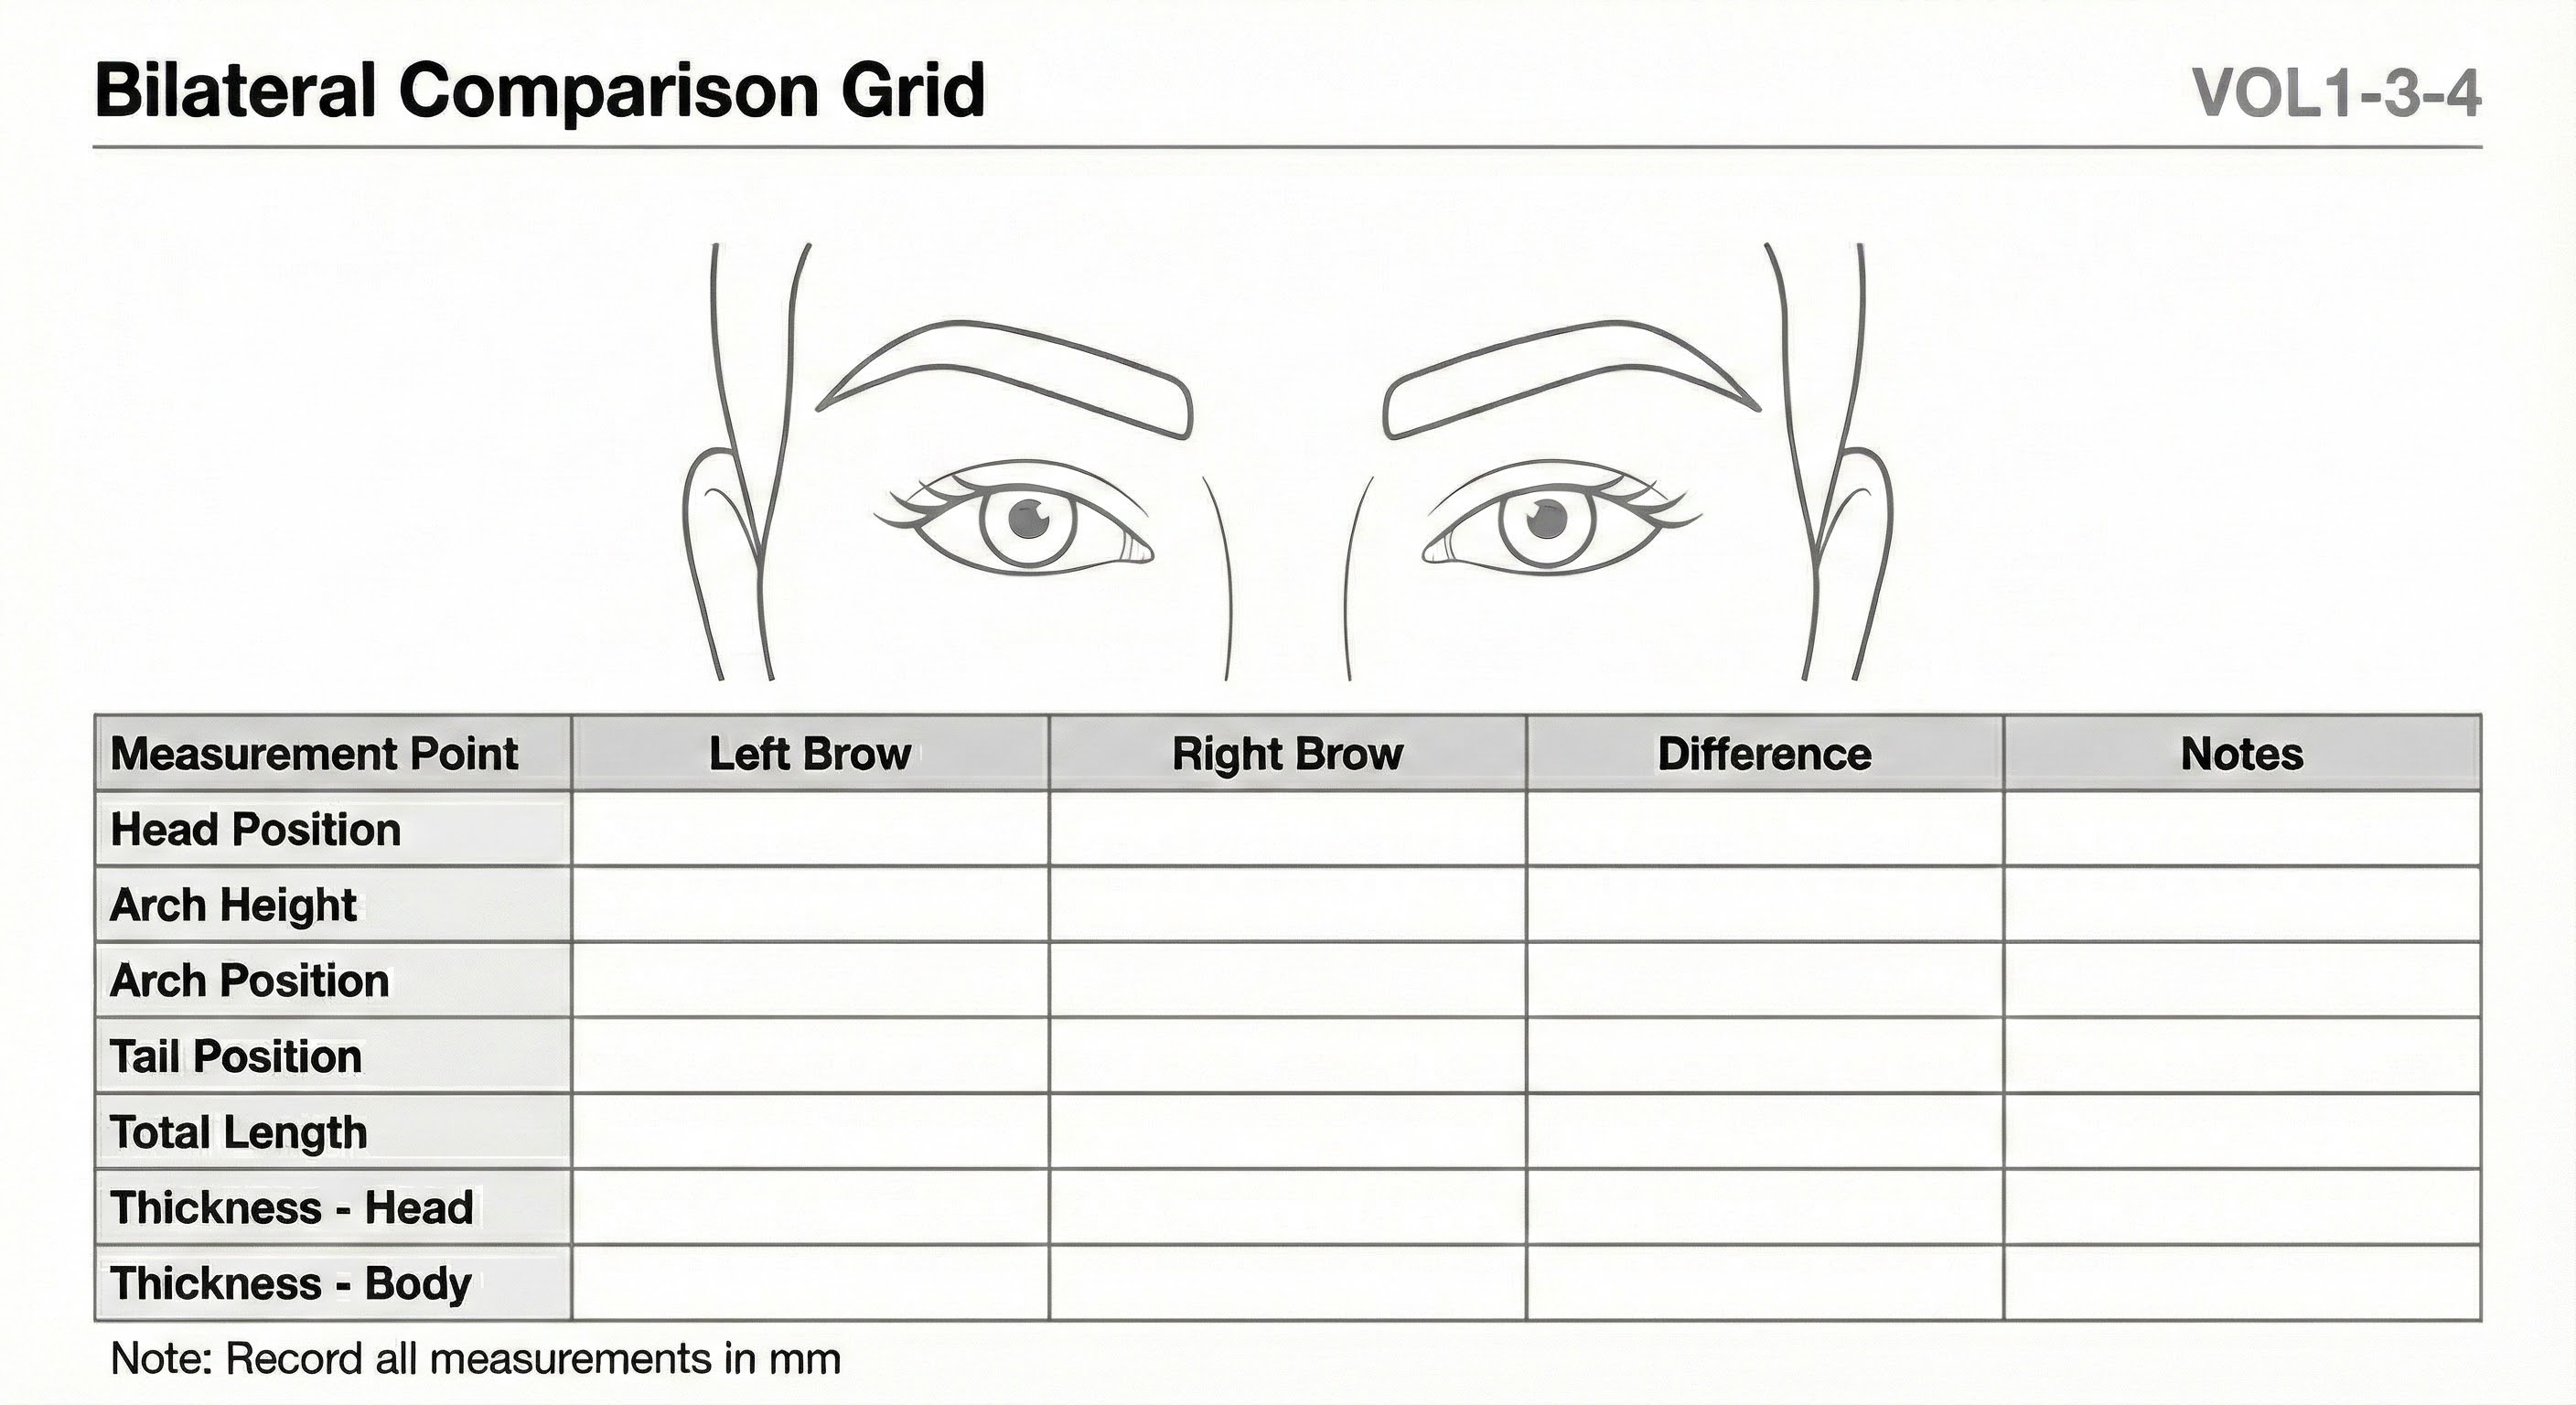
Bilateral Comparison Grid
Purpose: Show how symmetry is evaluated, not assumed
A frontal face view overlaid with a precise grid system for left-right brow comparison. Highlighted zones show common asymmetry areas.
3.4 Style Family Mapping Variations
While the 7-Point Protocol remains constant, point positioning varies by style family. These variations reflect the structural differences that define each family.
Classic Family
- Apex at 65-68% of brow length
- Moderate apex height (subtle arch)
- Tail terminus at baseline
Soft Harmony Family
- Apex at 60-65% of brow length (more medial)
- Minimal apex height (very subtle curve)
- Tail terminus at or slightly above baseline
Expressive Family
- Apex at 65-70% of brow length
- Variable apex height (depends on desired drama)
- Tail terminus at baseline with strong definition
Elevated Family
- Apex at 68-72% of brow length (more lateral)
- Increased apex height (pronounced lift)
- Tail terminus above baseline (lifted appearance)
Modern Edge Family
- Apex at 70-75% of brow length (most lateral)
- Sharp apex definition
- Tail terminus above baseline with sharp taper
3.5 Documentation Requirements
Complete mapping documentation protects both technician and client. The following must be recorded for every procedure.
Required Documentation
- Pre-mapping photographs: Frontal, 3/4, and profile views before any marking
- Mapped photographs: Same angles with all points clearly visible
- Measurement record: All seven points with bilateral measurements
- Style family selection: Documented with rationale
- Client approval signature: Confirmation of mapped design
Measurement Recording Format
| Point | Left | Right | Variance |
|---|---|---|---|
| Point 1 (Medial Origin) | [mm from centre] | [mm from centre] | [difference] |
| Points 2-3 (Head Height) | [mm] | [mm] | [difference] |
| Point 4 (Apex Position) | [% of length] | [% of length] | [difference] |
| Point 5 (Apex Height) | [mm above baseline] | [mm above baseline] | [difference] |
| Points 6-7 (Tail Position) | [mm from centre, mm height] | [mm from centre, mm height] | [difference] |
Acceptable variance: Up to 2mm difference between sides is within normal anatomical variation. Greater variance requires assessment and may indicate facial asymmetry that should be discussed with the client.